Looking at the specs of the Canon EOS R5, my first reaction was “who needs 8K RAW?” – as this cam offers high quality 4K modes as well. Until I saw the Lab results… Curious to hear more about our Canon EOS lab test? Read on.
During early August the Canon EOS R5 arrived for a short visit at the CineD office – exhibiting the firmware version 1.0. I was really curious to see how this mirrorless camera would fare in the lab as its specs are quite amazing, despite the early reported overheating issue.
Rolling shutter, dynamic range, and our underexposure test was performed – which quite surprisingly proved to be a challenge, as the overheating warning popped up early in the setup of the tests already – and some test runs had to be repeated after a 15min waiting period as the camera continued to shut down between takes.
This very fact cooled down my enthusiasm about the camera quite significantly – but that’s another story.
If you want to know how we test dynamic range, have a look here.
Canon EOS R5 – Rolling Shutter
Interestingly, despite the high resolution of the Canon EOS R5 sensor, a very good rolling shutter read out performance was recorded.
The Canon EOS R5 in full frame DCI mode (17:9) in high quality readout mode (that is 8K RAW, 8K H265 all-I and 4K DCI) has a rolling shutter of 15.5ms. That is the best result that we measured so far for a full frame sensor, even slightly better than the Canon C500 Mark II (15.8ms).
Rolling shutter for full frame 25fps low quality and 50 frames per second (in 4K DCI) were the same at 9.6ms, hence some subsampling is obviously happening in the background.
Canon EOS R5 – Dynamic Range at ISO 400
As usual, I started testing the internal H265 modes on the camera, but I noticed that 8K RAW looked different, less contrasty (despite using Canon LOG for H265).
Therefore, I tested both 8K RAW and the various H265 modes (8K DCI and 4K DCI). And yes, code value distribution and results differ – in 12bit 8K RAW the clipping luma value is 80%, whereas 10bit H265 goes to 100%.
Also, it was not possible for me to use the 8K files directly in IMATEST, as I had to develop the files in DaVinci Resolve (16.2.5) first, export TIFF’s and then do the analysis. Unfortunately, my GTX980 graphics card with 8GB memory showed a “GPU error” in native resolution. So I had to downscale to 6K to make it work.
Not surprisingly, if you intend to work with the 8K RAW files in native resolution, you will need a very capable hardware.
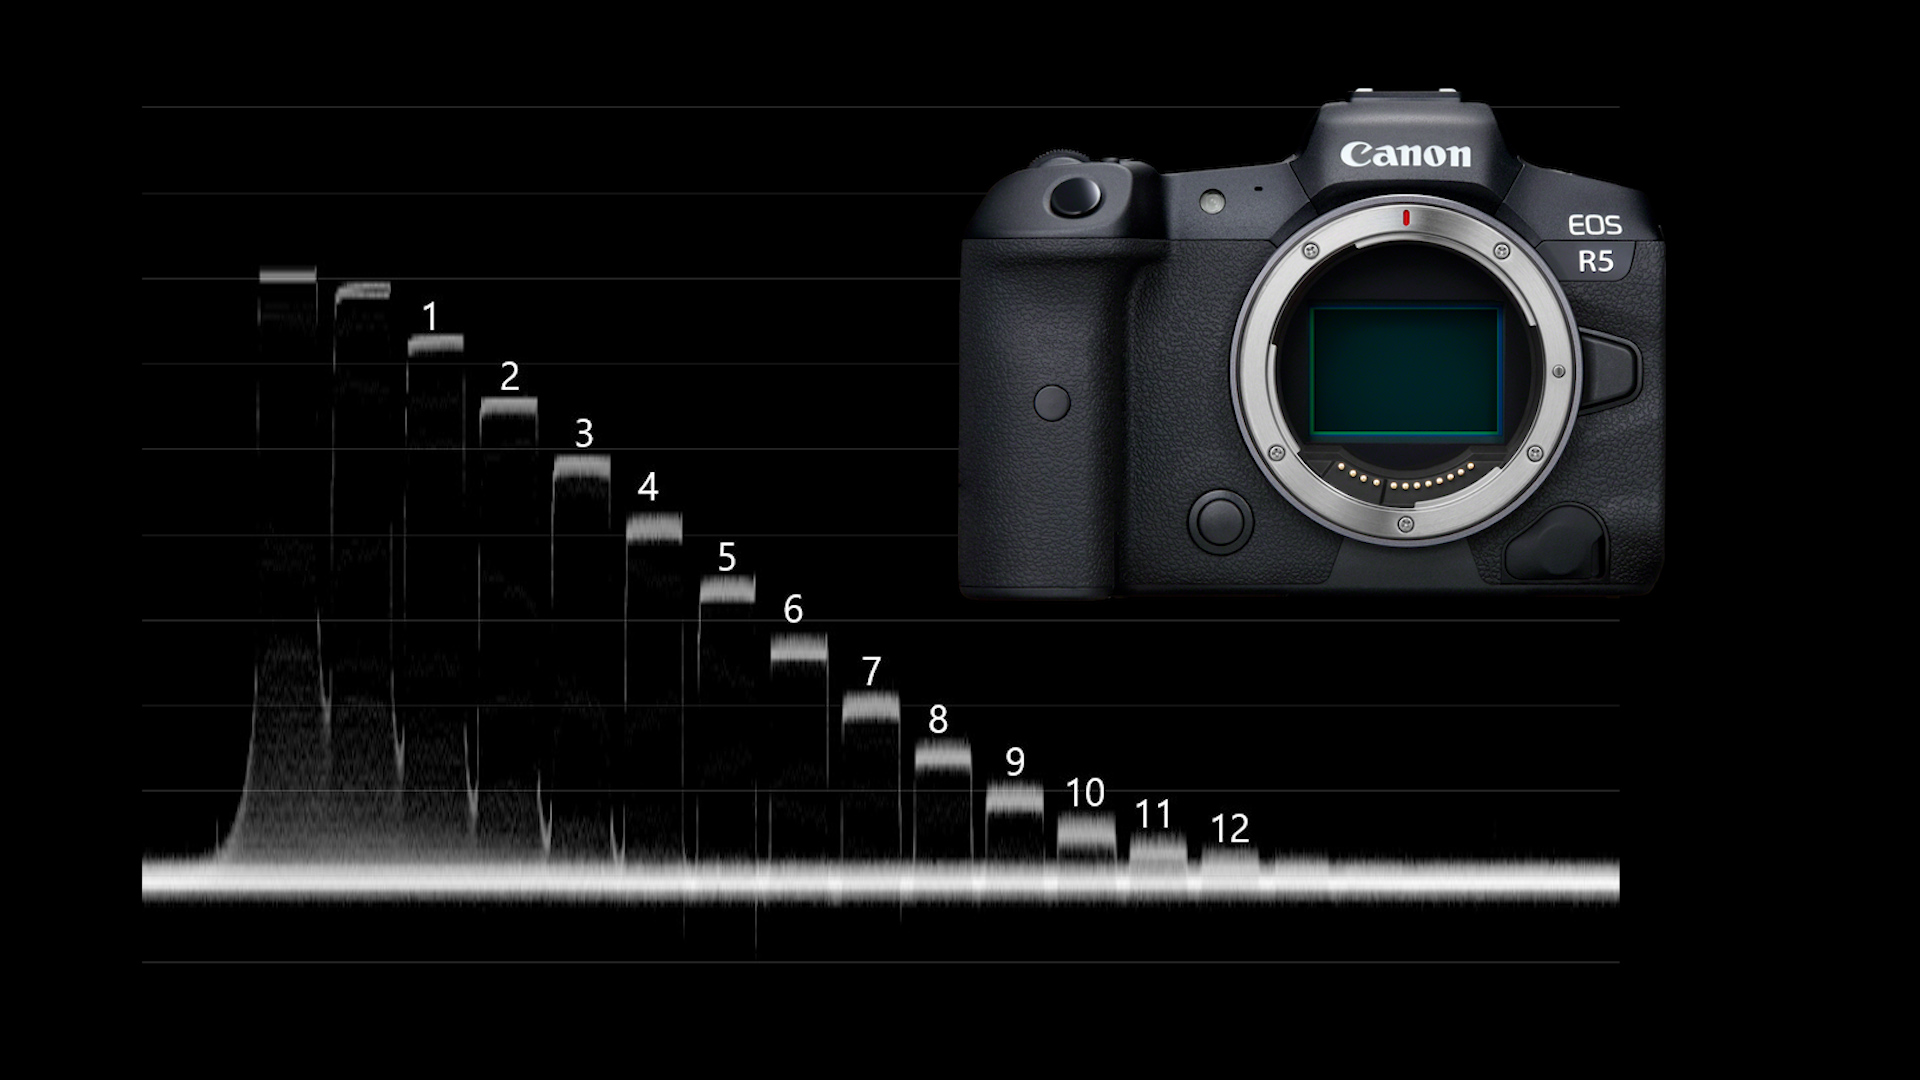
Let’s start with 8K RAW, here’s the waveform plot (figure 3). As can be seen below, about 12 stops can be identified above the noise floor. In general, the 8K RAW files are VERY noisy. Nevertheless, a 13th and even a 14th stop is visible inside the noise floor.

Because 8K RAW is so noisy, IMATEST (figure 4) calculates the signal to noise (SNR) threshold of 2 already at 10.3 stops.

However, a patch range of 16.8 stops is identified, and beyond the SNR = 1 (blue curve; “Low”) in the middle graph (figure 4) on the left-hand side at least 3 to 4 additional stops (buried in the noise floor) are present. Those can be “excavated” by using some noise reduction in post – hence, despite the low 10.3stops value at SNR = 2 much more is there if you know how to treat the files in post.
So, obviously the RAW files really represent something RAW off the sensor – not much signal processing (noise filtering, etc…) seems to happen. Which is a good thing!
Big surprise when testing the H265 8K mode at ISO400 – it looks like the noise floor is almost cut off and only 10stops are calculated by IMATEST.

We are left to speculate what is happening here and why the darker stops are not accessible anymore – again, looking at the middle graph of the IMATEST dynamic range results, this behavior is clearly visible (figure 6) -where I mentioned the red circle in figure 4 above, in figure 6 the noise signal is gone.

A similar albeit slightly better result is obtained for 4k DCI mode (high quality, full frame). 10.8 stops are calculated at SNR = 2, see figure 7 below (probably due to scaling of the 8K into 4K).

Thus, the dynamic range results obtained for the Canon EOS R5 show a mixed bag: in 8K RAW, albeit very noisy there is access to further stops beyond the 10.3stops at SNR = 2 if you are willing to take the time in postproduction. If you want to use H265 in 4K DCI mode, you get a slightly better result at 10.8 stops (SNR = 2) but you sacrifice everything beyond the 12th stop.
Next up is our underexposure test. As mentioned previously, we arrange a studio scene where one of my colleagues is performing as a model – in this case, Nino – and his face is exposed at max. 60% luma value for a shutter angle of 360° (or 1/25th of a second) at F4 for 25fps 8K RAW ISO400.
As I noticed already during the dynamic range tests of the Canon EOS R5, the 8K RAW files are flatter and provide more stops so I was curious to do this test in 8K RAW.
Then we successively underexpose the scene by reducing the shutter angle to 180°, 90°, 45°, 22.5°, and 11.25° thus reaching 5 stops of underexposure.
In postproduction using DaVinci Resolve 16.2.5, the files are then brought back to the zero exposure base line. Using RAW this is quite comfortable as just the “exposure” slider in the RAW tab of Resolve needs to be adjusted. Quite strangely, this only worked until +3 stops. The slider allowed for +4 and +5, but nothing happened. Hence, for +4 and +5 I had to manually adjust the image by lifting, gamma, and gain controls (checking the waveform of the respective scene as a reference).
Also, it is important to note that I performed these underexposure tests on a 2K DCI timeline in Resolve (otherwise my 980 GTX GPU was giving errors when using noise reduction). Consequently, the 8K RAW files are already scaled to 2K, thereby massively improving the noise just by the advanced scaling algorithm of DaVinci Resolve…
So, here is the zero base line scene (lightly graded):

Let’s jump ahead at the 3 stops underexposed scene, pushed back to zero, figure 9. The image is still usable, however strong noise is already present. Noise reduction helps to improve the image, see figure 10 (3 frames temporal, threshold 30, and spatial threshold 8).


At 4 stops underexposure, the image falls apart due to the strong noise, figure 11. Also, noise reduction doesn’t help any further, as it needs to be so strong that image detail suffers massively.

Just for reference, here is the 5 stops underexposed image, pushed back to zero, figure 12. Color and detail are maintained quite well, but the noise…

Also, just for fun, I tried heavy temporal (4 frames, threshold = 35) and spatial (threshold = 10) noise reduction on the 5 stops underexposed image, see figure 13. Image detail is completely gone.

As a summary, I would rate the -3 stops underexposure image as the usable limit.
The lab results show a mixed bag: rolling shutter performance is superb on the EOS R5 (15.5ms), despite the high resolution read out – the best we have measured so far for a full frame camera!
The dynamic range of the Canon EOS R5 in H265 CLOG modes is on the low end for a full frame sensor – only in 8K RAW the Canon EOS R5 starts to shine by offering additional stops, albeit buried in the noise floor.
In the underexposure tests of the Canon EOS R5, even though we used 8K RAW the performance is average. 3 stops underexposure is possible, but not more. Even smaller sensor cameras offer more in that department (e.g. the BMPCC6K) – have a look at our lab test section for more information.
8K RAW is very very taxing on the computer hardware – if you don’t run the latest hardware you will have massive issues during playback, not even speaking of additional nodes for color grading.
Also, overheating was a big issue during the lab test: just setting up the measurements and studio scene, keeping the camera running and recording video was very problematic.
So choose wisely if this camera is for you – especially looking at the various other offerings on the market.
The Canon EOS R5 is already shipping. Do you have some experience filming with it? Please share with us some stories from the filed!


