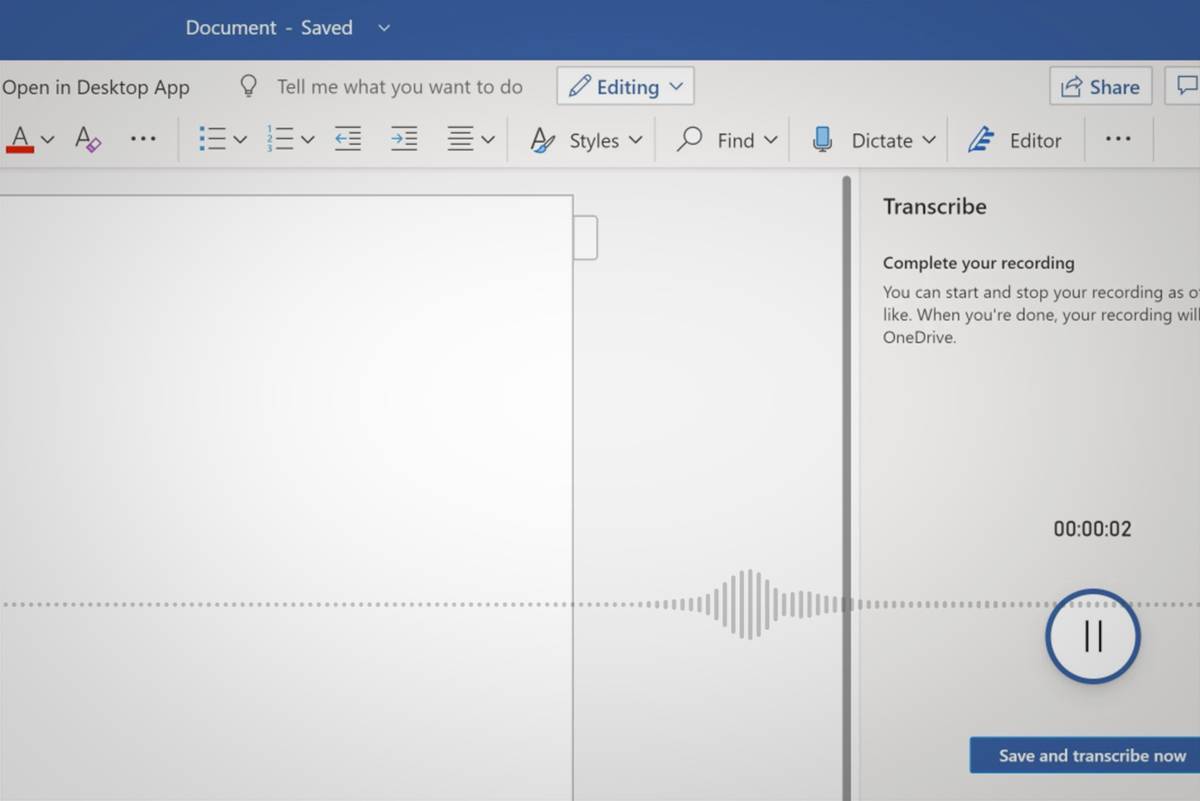
(Pocket-lint) – Microsoft has added a transcription feature to Word for the web, providing an easy way to automatically transcribe audio.
What is Transcribe in Word?
Transcribe in Word enables transcriptions of pre-recorded or live audio. It appears in the online version of Word for Microsoft 365 subscribers.
The feature supports existing audio and video files or the ability to directly record conversations and have them automatically transcribed. Microsoft’s AI will even separate speakers and organise the conversation into sections that you can easily edit and insert into a Word document.
How does Transcribe in Word work?
Transcribe in Word can capture any audio from your PC, which means you can use it to transcribe everything from Zoom meetings to YouTube videos. Word will also capture your own audio from your PC’s mic. Keep in mind, when capturing live audio, you can dictate things like “smiley face” or “heart emoji” to have those accurately transcribed. (See this article for a list of all the voice commands.)
If you want to transcribe audio or video that you’ve pre-recorded elsewhere, Transcribe in Word will support up to 200MB of MP3, WAV, M4A, or MP4 files. Processing time for the transcription will vary, of course. You will also be limited to five hours per month for uploaded audio.
For audio recorded within Word on the web, there is no transcription limit.
Transribe live audio
You can record and transcribe live audio directly in Word for web while taking notes in the canvas. Word transcribes in the background as you record; you won’t see text on the page as you would when dictating. You’ll see the transcript after you save and transcribe the recording.
- Make sure you’re signed in to Microsoft 365, using Microsoft Edge or Chrome.
- Go to Home > Dictate dropdown > Transcribe.
- Select Start recording.
- If it’s your first time transcribing, give the browser permission to use your mic.
- Look for the pause icon to be outlined in blue and the timestamp to let you know recording has begun.
- Start talking or begin a conversation with another person. Speak clearly.
- Leave the Transcribe pane open while recording.
- Pause recording by selecting the pause icon.
- Resume recording by selecting the microphone icon.
- When finished, select Save and transcribe now to save your recording to OneDrive.
- The transcription process will start and may take a while.
- Keep the Transcribe pane open while the transcription is being made.
- The recordings will be stored in the Transcribed Files folder on OneDrive.
Transcribe pre-recorded audio
You can upload a pre-recorded audio file and then transcribe the recording.
- Make sure you’re signed in to Microsoft 365, using Microsoft Edge or Chrome.
- Go to Home > Dictate dropdown > Transcribe.
- Select Upload audio.
- Choose an audio file from the file picker.
- Transcription may take a while depending on your internet speed.
- Be sure to keep the Transcribe pane open while the transcription is happening.
Edit your transcript
Your transcript will appear alongside the Word document, complete with the recording. If you want to pull, for instance, a quote from it, click the plus icon on any line of the transcript and the exact quote will be inserted. Alternatively, if you want to send the entire transcript to someone, you can simply click “add all to document” and then your full transcript will be laid out in Word.
For more ways on how you can edit and interact with your transcript, check out Microsoft’s support page here.
Can iOS or Android users try Transcribe?
Transcribe is launching initially on Word for the web, though there are plans to bring the feature to the Word for iOS and Android apps this year.
Do you need a Microsoft 365 subscription?
Yes. Microsoft is limiting Transcription in Word to Microsoft 365 subscribers.
Which languages are supported?
English is the only supported language at launch.
Want to know more?
Check out Microsoft’s blog post about Transcribe in Word.
Writing by Maggie Tillman.


%20(1).jpg)


